In this guide
Start with the process
A welding mask or helmet protects the eyes and face from the arc. A respiratory mask serves a different purpose. Write down the processes and current range you intend to use before comparing helmets.
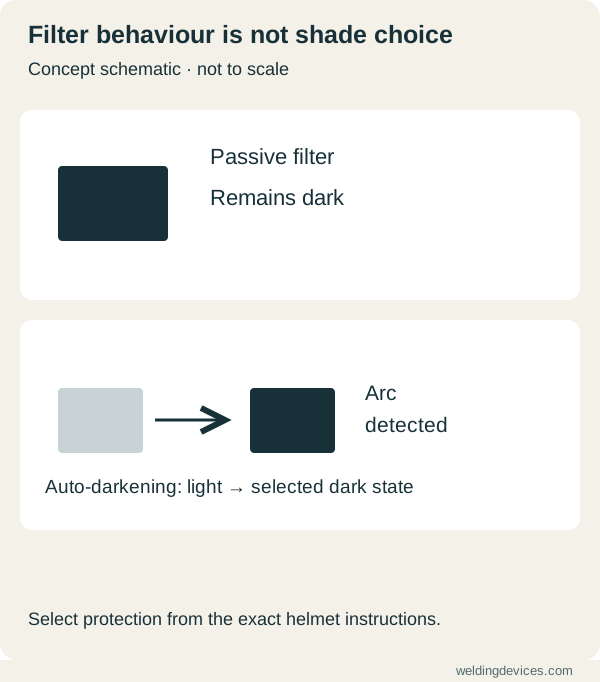
Schematic; source.
Passive or auto-darkening?
A passive filter stays dark. An auto-darkening filter changes from a light viewing state to the selected welding shade. Variable-shade models offer more adjustment across applications. Choose the shade using the appropriate selection table and the helmet instructions; one shade does not suit every task.
Compare the useful details
- Suitable shade range and documented process compatibility, including low-current TIG if needed.
- Sensor coverage, sensitivity controls and reliable operation in your working position.
- Headgear fit, weight and room for compatible eye and respiratory protection.
- Availability of replacement cover lenses, batteries and support.
A practical buying check
Try the helmet with the other protection you will wear. Can you adjust it with gloves? Does it stay positioned when you move? A larger window is useful only if the complete helmet suits the work. Ask for the product documentation before paying.
Keep it ready for welding
Inspect the filter and protective covers, clean them as instructed and confirm the welding mode before starting. Wear suitable safety glasses underneath. A grind setting is not a welding shade.
Read the documentation before the reviews
Start with the filter's documented protection, intended processes and operating limitations. Ask for instructions that identify the exact model being sold. A listing with a large viewing area and attractive graphics may omit the information you need most. Keep process compatibility, shade selection, sensitivity and maintenance beside the price when comparing options.
Reviews can help identify comfort or spare-part concerns, but a popularity score does not verify protective performance. Separate a customer's experience from the manufacturer's documentation and any applicable product certification. If a seller cannot identify the filter or supply credible instructions, the missing information is a purchasing problem. Do not fill that gap with an assumption that every dark-looking lens offers equivalent protection.
Test the fit without an active arc
Try the helmet with the equipment safely isolated and the other protection you intend to wear. Move into the positions needed for a representative joint. Check whether the headgear holds the helmet steadily and whether the view remains useful. A helmet that feels comfortable upright may interfere with a collar or respirator when you lean toward a bench.
Adjust the headgear using the instructions and check controls with gloves on. Ask whether you can obtain different compatible headgear or replacement components. Avoid making unauthorised alterations to solve a poor fit. This fitting session is about comfort, access and compatibility; it should not involve looking at an unprotected arc to see whether a filter reacts quickly enough.
Check low-current and awkward-position use
If you intend to learn TIG at low current, ask for explicit compatibility information for that operating range. For restricted joint access, consider whether the sensors may be obstructed in your working position. Discuss the actual task with the supplier. A successful demonstration in an open position does not answer every question about the intended use.
Learn what the sensitivity, delay and operating modes mean for the exact helmet. Follow the prescribed functional checks before welding. A grind mode or light viewing state must not be confused with the required welding protection. If the filter behaves unexpectedly or is damaged, stop and follow the manufacturer's instructions rather than continuing to test it with your eyes at risk.
Include wear parts in the price
Find the part numbers and availability of external cover lenses, inner covers, batteries where applicable and headgear. Ask how quickly those items can be supplied locally. Scratched or dirty covers can make a good filter frustrating to use, while unavailable replacements can make a cheap helmet an expensive dead end.
Estimate the complete ownership cost from the helmet, routine replacements and suitable storage. Confirm which covers are included in the package. Keep a clean spare where the manufacturer recommends it, and follow its cleaning method. A product that remains comfortable and maintainable during normal use may offer better value than a larger window with uncertain support.
Build a short inspection habit
Before the job, inspect the shell, filter, covers and headgear as instructed. Confirm the correct mode and shade selection for the process. Check the required power condition and prescribed operation test. Keep suitable safety glasses in the equipment plan. After work, store the helmet so it is protected from damage and contamination.
Use the complete protection guide to check the combination and the learning paths to prepare a first supervised exercise. Your helmet should make it easier to see and work comfortably while meeting documented protective requirements. It is one part of the system: fume controls, clothing, gloves, suitable eye protection and protection for nearby people still need their own decisions.
Put the choice in context.
Try the welding process finder to narrow your equipment research, or compare a complete setup in the ownership cost calculator.
References
Open the publisher’s page. If a new tab fails, use “Open directly” or copy the address into your browser.
- Miller — Selecting the right welding helmet · sourceOpens the source in a new tabmillerwelds.comLink checked · 31 Oct