
In this guide
What this lesson teaches
This lesson introduces the movements and observations behind a first MIG/MAG exercise. The machine feeds consumable wire while shielding gas protects the weld region. Your job is to prepare a suitable coupon, maintain the supported gun position and observe the result. Begin with identified mild-steel practice material selected by your instructor. Changing alloy or process introduces new requirements.
The exercise supports supervised learning. Use the exact machine and wire instructions, required protection and effective exposure controls. Structural repairs, vehicles, lifting equipment and pressure parts need the applicable competence, procedure and inspection. A completed practice bead is a learning record, not approval to use a joint in service.
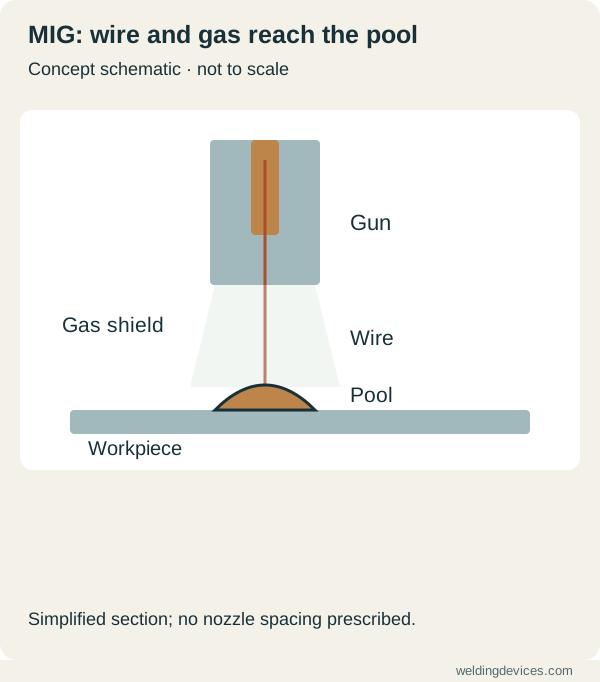
Schematic; source.
Prepare the coupon and workspace
Have your instructor select the material, joint and preparation method. Remove the contamination specified by that method and check fit-up. Hold the parts appropriately and arrange a clean work connection as the manual requires. Keep the torch path visible and clear of clamps. Plan suitable support for your hands without exposing them to hot material.
Rehearse the movement with the equipment safely isolated. Start where you can see the joint comfortably and follow the whole path. If your wrist reaches its limit halfway along, change the arrangement before welding. Identify a safe place for the hot coupon and establish how the instructor will stop the exercise.
Confirm the supported setup
Record the wire designation and diameter, gas, polarity and machine configuration. Use the manufacturer's starting chart or the instructor's documented setup for that combination. Check the compatible feeding parts, tip and nozzle. Do not transfer a setting from a different wire, gas or machine because the thickness looks similar.
Verify gas delivery using the specified method, inspect accessible connections and confirm the required protection. Keep extraction effective. If a warning, damaged lead or shielding concern appears, resolve it before practising. Write the baseline in your notebook so a later change has a clear reference.
Separate work angle from travel angle
The work angle describes how the gun points across the joint. For an equal-thickness, symmetrical ninety-degree T-joint, a forty-five-degree work angle is a common introductory reference. The travel angle describes its inclination along the direction of movement. Miller discusses modest travel angles for ordinary flat-position MIG examples; your joint and procedure govern the actual setup.
Identify both angles during the isolated rehearsal. Then maintain the specified electrode extension and gun position through the short exercise. Avoid repeatedly lifting the gun to improve your view. Adjust the safe working position instead. Solid-wire and flux-cored configurations can need different technique, so do not carry the same movement into a different wire without checking.
Make a short straight bead
With the instructor's setup, begin a short stringer bead: a deliberate, essentially straight movement along the selected path. Watch the weld pool and joint, rather than concentrating only on the brightest point of the arc. Aim for steady progress and a consistent gun position. Elaborate circles or a wide weave add variables before you understand the baseline.
Stop as instructed and place the coupon in the planned hot-part area. Record where movement became awkward or visibility changed. Repeat the same exercise before changing settings. Several comparable short samples can teach more than one long bead made while your position gradually deteriorates.
Inspect and troubleshoot one observation
After appropriate cooling, inspect the full sample, including its start and finish. Record bead consistency, visible pores, edge discontinuities and any dimensional change. Ask the instructor what those observations mean and which acceptance checks apply. Appearance alone cannot prove fusion or strength.
For a feeding interruption, inspect the supported wire path and wear parts with the equipment isolated. For visible porosity, investigate preparation, shielding and the environment through a structured check. Change one justified variable, label the next coupon and compare. Keep a fault record instead of turning voltage and wire speed together until something looks different.
Keep the technique record useful
Write one precise observation after each run: the gun lifted near the final clamp, the wire feed interrupted once, or the start was harder to see. Add the instructor's suggested check beside it. This gives the next coupon a defined purpose. If several variables changed, say so rather than claiming that one adjustment caused the improvement. Keep your earlier samples for comparison and repeat the supported baseline when the cause remains uncertain.
Move from beads to a simple joint
When your instructor agrees the movement is consistent, practise the selected joint using its specified fit-up and setup. Rehearse access again because a joint changes what you can see. Keep the work angle, travel movement and gun distance consistent within the exercise. Inspect the result using the agreed method.
Use the joint preparation lesson before progressing to another geometry. Record what you learned and one question for the next session. The useful achievement is a repeatable, explained exercise with honest inspection. Build that habit before introducing more difficult positions, unfamiliar materials or advanced machine programmes.
For a sudden increase in expelled droplets, use the MIG spatter investigation to record what changed before considering an adjustment.
Put the choice in context.
Try the welding process finder to narrow your equipment research, or compare a complete setup in the ownership cost calculator.
References
Open the publisher’s page. If a new tab fails, use “Open directly” or copy the address into your browser.
- Miller — MIG basics for mild steel · sourceOpens the source in a new tabmillerwelds.comLink checked · 31 Oct
- HSE — Welding exposure controlsOpens the source in a new tabhse.gov.ukLink checked · 31 Oct