
In this guide
Begin with the required joint
A weld starts with two parts and a defined connection, not with a current setting. Establish the material, joint geometry, dimensions and intended use. A practice coupon should have a clear learning objective; production work needs the relevant drawing, procedure and acceptance requirements. Unknown material or an unclear service requirement is a question to resolve before welding.
Think of preparation as the stage that makes the welding task repeatable. If every coupon has a different gap, edge or alignment, a changed bead tells you little about your hand movement. Consistent preparation gives the later technique exercise a useful baseline.
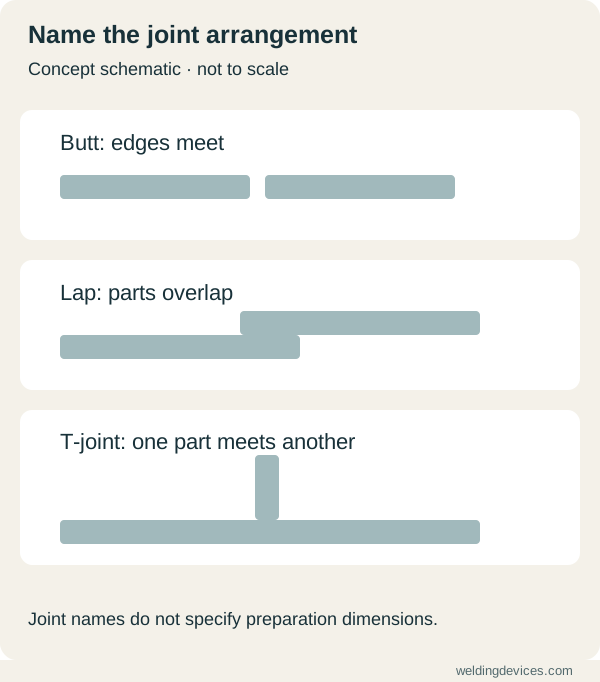
Schematic; source.
Recognise common joint arrangements
A butt joint brings edges together. A lap joint overlaps parts. A T-joint places one part against another, often with a fillet weld. Corner and edge arrangements introduce their own access and preparation questions. These names help you describe the work, but they do not specify every dimension or acceptable weld.
Sketch the selected exercise and label the accessible sides. Identify where the torch, filler and inspection tools must reach. A joint that looks simple from above can become awkward after the first connection is fixed. Rehearse the sequence with the equipment isolated and discuss any restricted access with your instructor.
Prepare identified material
Follow the specified cutting and cleaning method. Check edges for the required condition and remove contamination appropriately. Material coatings and residues may introduce additional hazards, so identify them before choosing a preparation method. Read tool and product instructions and use the required exposure controls and protection.
A bevel, root face or root gap must follow the relevant joint design and procedure. Do not select one from a photograph or assume that a larger opening improves every weld. Have an instructor define the practice preparation and measuring method. For actual work, maintain the specified tolerances and records rather than improvising the joint to suit your first attempt.
Measure fit-up before tacking
Place the parts on suitable support and use consistent reference points. Check the specified gap, alignment and dimensions. Arrange appropriate clamps without blocking the torch or required inspection. Identify how the work connection will be made according to the equipment instructions. A convenient clamp location is not automatically a suitable electrical return arrangement.
Record the measurements and rehearse access. If the assembly is already outside its permitted fit-up, correct that through the appropriate fabrication method before welding. Machine adjustments should not be used to disguise a preparation problem. This distinction helps beginners understand whether the next improvement belongs at the bench or at the arc.
Treat tacks as part of the plan
Use the tack size, placement, sequence and acceptance requirements selected for the exercise or procedure. Check the assembly again at the specified stages. Tacks can affect alignment and later access, and they should not be treated as irrelevant marks that disappear once the main weld begins.
Record any movement or visible problem and have it reviewed. Follow the relevant instructions for preparing or removing an unsuitable tack. Do not simply weld over an uncertain connection and assume that the final bead fixes it. The lesson is to maintain an acceptable starting condition through the whole assembly sequence.
Inspect while the information is available
Pre-weld checks establish material and fit-up. Checks during the sequence can identify changes in alignment, cleaning needs or events that deserve review. Final inspection addresses the completed work against its actual requirements. Keep the stages distinct so that a good final photograph does not erase a concern discovered earlier.
For practice, label the coupon and record the setup and sequence. Note a shielding interruption, tungsten contamination event or electrode restart where relevant. These observations help an instructor interpret the result. They are useful even when the surface does not show an obvious defect afterwards.
Understand visual inspection's limits
Look at the whole accessible sample after suitable cooling and cleaning. Record visible pores, cracks, edge discontinuities, consistency and dimensional changes. Use the agreed measuring method where the exercise requires dimensions. Avoid judging the weld only from even ripples or a smooth surface.
Visual examination cannot establish every internal property or prove strength. The application determines whether further examination is needed and who is competent to perform it. Destructive practice tests also need appropriate supervision, protection and a defined method. An improvised attempt to break a sample is not a qualification test or a substitute for the required inspection of a real part.
Turn the result into a next lesson
Keep three short notes: what was prepared, what happened during welding and what inspection found. Separate observations from possible causes. If a result is unacceptable or uncertain, keep the affected item out of service and follow the relevant review process. More filler or cosmetic grinding does not demonstrate that a problem has been resolved.
Choose one justified change for the next supervised coupon and retain the previous sample for comparison. Use the MIG, TIG or stick manual for the movement exercise. Good preparation and honest inspection give those techniques a clear purpose: producing a repeatable result that can be assessed against a defined requirement.
For a specific example of hidden interfaces, see lack of fusion: what to investigate. TWI explains why incomplete fusion may occur at a joint face or between runs; surface appearance cannot settle that internal question. Source checked 29 October 2026.
Put the choice in context.
Try the welding process finder to narrow your equipment research, or compare a complete setup in the ownership cost calculator.
References
Open the publisher’s page. If a new tab fails, use “Open directly” or copy the address into your browser.
- Miller — MIG basics for mild steel · sourceOpens the source in a new tabmillerwelds.comLink checked · 31 Oct
- TWI — Joint design and preparationOpens the source in a new tabtwi-global.comLink checked · 31 Oct
- TWI — Porosity and inspection cluesOpens the source in a new tabtwi-global.comLink checked · 31 Oct
- HSE — Welding exposure controlsOpens the source in a new tabhse.gov.ukLink checked · 31 Oct
- TWI — sidewall/inter-run fusion; checked 29 October 2026 · TWI explainsOpens the source in a new tabtwi-global.comLink checked · 31 Oct