
In this guide
What you are seeing
Porosity is gas trapped as the weld solidifies. Surface pinholes can be a clue, but a clean-looking surface does not rule out internal porosity. Acceptance depends on the application and inspection requirements.
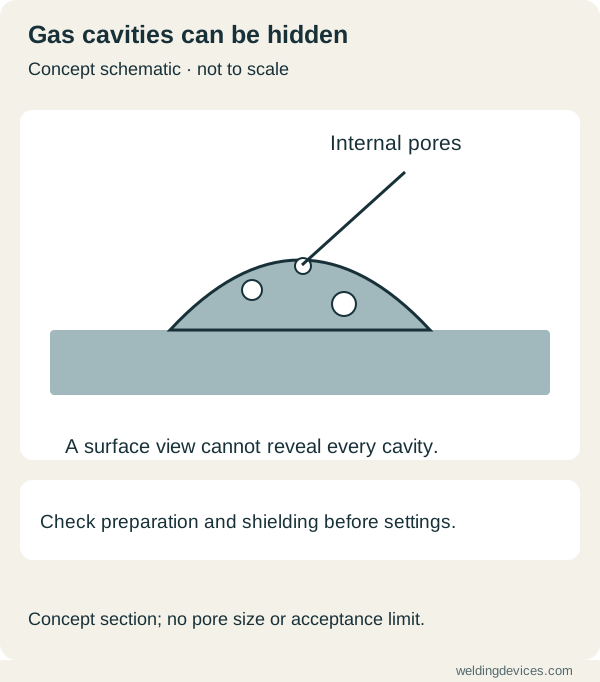
Schematic; source.
Start with preparation
Contamination, moisture and coatings can introduce gas into the weld. Check the base material and consumables. Identify coatings before removal: their dust and welding fumes may require specific controls.
Check the shielding system
Draughts, leaks, disturbed shielding and excessive gas flow can all undermine protection. Check the bottle contents, gas path, nozzle condition and the setup specified by the manufacturer. More flow is not automatically better.
Workshop example
If pinholes appear after opening a workshop door, record that change before adjusting the machine. Inspect the shielding arrangement, then make one controlled change and test on a fresh coupon. Changing voltage, wire speed and gas flow together makes the result harder to interpret.
Keep a short fault log
- Material, coating and preparation method.
- Wire or electrode identity and storage condition.
- Gas type, equipment condition and draughts.
- What changed before the defect appeared.
- Result after one corrective change.
This approach builds a repeatable diagnosis. If the cause remains uncertain, stop using the affected parts and seek competent review. Grinding the surface or covering a defective bead does not demonstrate that the joint is acceptable.
Keep the suspect sample
Before changing anything, identify the affected work and keep a representative sample where it is safe to do so. Photograph the surface and record the material, process, consumable and circumstances. Note whether the issue appeared at the start, throughout the bead or after a restart. That pattern can guide investigation, although it cannot establish the cause by itself.
Avoid making the evidence disappear immediately under a grinder. Removing visible pinholes may make the surface look better without establishing that the joint is acceptable. If the part has an acceptance requirement, follow the applicable reporting and inspection procedure. For practice, label the coupon and keep it beside a satisfactory comparison. A diagnosis becomes much easier when the original observation remains available.
Follow the shielding path in order
For a gas-shielded process, start with the correct gas for the documented setup and inspect the supply path as instructed. Check connections, hoses, the regulator arrangement and the torch's condition. Confirm flow using the appropriate equipment and method. A cylinder pressure reading does not establish the flow reaching the welding area. Do not keep raising a setting without checking whether the original setup is suitable.
Observe the working area too. A draught, badly placed fan or awkward torch position can change shielding at the joint. Keep exposure controls effective; the answer is not to turn off necessary extraction. Ask a competent person to help arrange shielding and fume capture together. Record any change before trying another labelled coupon, rather than adjusting several controls at once.
Check material and consumable handling
Look beyond the joint's visible surface. Establish whether the base material is identified and whether coatings, moisture or contamination require a particular preparation method. Review wire, electrode or filler storage against the supplier's instructions. A clean-looking piece of metal and a recently opened box are useful observations, but neither guarantees that every relevant condition has been addressed.
Compare the affected sample with material prepared through a known routine. Use the same supported setup where appropriate and keep the comparison controlled. If the problem follows a particular batch, record that fact and seek supplier or technical advice. Avoid declaring a product defective from one bead. Separate what you observed from the conclusion you still need evidence to support.
Change one thing, then compare
A useful practice investigation has a baseline, a single deliberate change and a repeat sample. For example, correcting a documented shielding issue should be followed by another coupon prepared in the same way. Label both samples and compare the agreed observations. If preparation, gas, programme and hand movement all change together, an improved bead tells you little about which change mattered.
Keep a short troubleshooting record with columns for observation, possible cause, check performed and result. Record negative findings as well as successful changes. A checked connection that was already sound helps narrow the discussion later. If the issue persists after the supported checks, stop treating further random adjustments as progress and bring the record to an instructor, supplier or qualified welding specialist.
Know when the investigation is finished
The end point is an acceptable result under the relevant inspection requirement, not merely the disappearance of surface holes. Visual examination can identify clues, while other examination may be required by the application. Practice coupons are useful learning tools; they do not qualify a production procedure or prove a repair fit for service.
Use the joint inspection lesson to organise observations, then follow the job's actual acceptance method. A reliable troubleshooting routine leaves you with a clear cause or a clearly stated uncertainty. Both are better outcomes than an undocumented setting change followed by another attractive-looking weld.
Put the choice in context.
Try the welding process finder to narrow your equipment research, or compare a complete setup in the ownership cost calculator.
References
Open the publisher’s page. If a new tab fails, use “Open directly” or copy the address into your browser.
- TWI — What is porosity and how can it be prevented?Opens the source in a new tabtwi-global.comLink checked · 31 Oct
- TWI — Weld imperfections: porosity · sourceOpens the source in a new tabtwi-global.comLink checked · 31 Oct