
In this guide
MIG welding burn-through happens when metal melts through and leaves an opening. On thin sheet, investigate the material thickness, joint fit-up and time spent heating one location before changing several controls. A lower setting alone is not a complete solution: the joint still needs the fusion required by its intended application.
Reader question: Why does a MIG weld burn through thin sheet?
Learning objective: Distinguish burn-through from distortion and excess penetration, record useful evidence, and plan a controlled supervised practice comparison without guessing a universal setting.
Recognise the opening before naming the cause
The Millermatic 211 manual, section 9-13, describes burn-through as complete melting through the base metal that leaves holes. Its next sections treat other features separately. Distortion means a change in shape; a sheet can bow without having a hole. Conversely, an opening does not tell you everything about the surrounding joint.
Excess penetration is another term worth separating. TWI's shape-imperfection review describes weld metal protruding through the root of a one-sided butt weld. That is not the same observation as missing metal. TWI also explains that acceptable penetration depends on the application. Its historical code examples are not acceptance limits for your practice coupon.
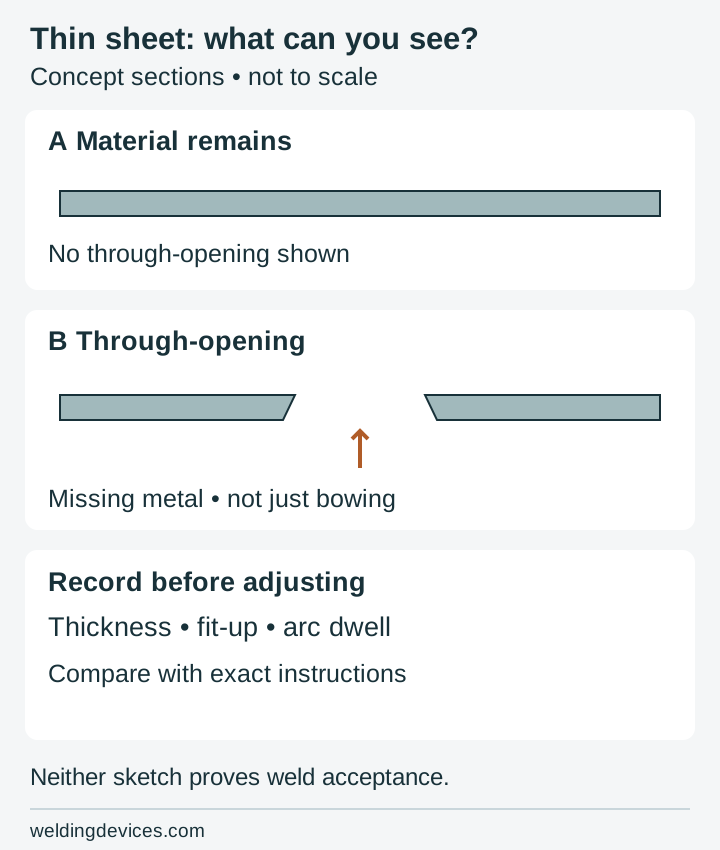
Conceptual sections, not to scale; no dimensions, settings or weld acceptance are implied. Definitions follow the Miller manual and TWI terminology.
Start with the actual sheet and joint
Write down the identified material, measured thickness and joint arrangement. A butt joint places edges together; a lap joint overlaps the pieces. Do not assume their setup requirements are interchangeable. Note whether the hole began beside an edge, across a joint opening, or after stopping and restarting.
Miller's sheet-metal guidance emphasises close fit-up and explains why an unintended opening between thin edges increases burn-through risk. This is manufacturer guidance, not permission to close every specified root gap: follow the joint design or practice instructions. TWI separately stresses matching fit-up to the welding procedure.
Check the fit before blaming the machine. A dial correction cannot restore metal already absent from the prepared joint. Use the preparation and inspection guide to organise these observations, and record an unknown thickness or material as unknown rather than estimating from appearance.
Separate local heating from the displayed settings
Dwell is the time the arc remains over a location. A pause can change the local heating even when the machine display has not changed. Miller's burn-through explanation identifies excessive heat as a principal cause and lists travel speed alongside voltage and wire-feed speed as investigation variables.
The documented Millermatic troubleshooting table also includes steady travel among its corrective directions. It is a March 2016 manual for that machine revision, not a transferable table for every wire, gas, program or thickness. Use your equipment's applicable instructions and approved practice setup before making an adjustment.
Do not turn “move faster” into a race. An instructor needs to assess both the opening and whether the comparison achieves the required fusion. If your hand movement needs practice, rehearse with the equipment isolated as instructed before another live attempt.
Manage the sequence without inventing a repair
Miller's sheet-metal article discusses distributing heat with intermittent welding and using backing or chill bars to conduct heat away. These are options to assess within an appropriate joint design, not universal remedies. A joint needing a continuous weld cannot simply be replaced with disconnected stitches.
For a beginner, start by recording the planned sequence and any pauses or cooling periods prescribed for the exercise. Read the thin-sheet distortion lesson for the separate question of shape change. Do not improvise a backing material, bridge a hole repeatedly, or continue on an unknown coating. Follow the workspace safety checks, including protection, fume and fire controls. Critical or uncertain work needs qualified assessment.
Hypothetical example: the hole appears at a restart
Imagine supervised practice on identified mild-steel offcuts. The learner labels an opening that appeared at a restart near the joint edge. No voltage or wire-speed change was recorded. This does not prove that the restart caused the hole.
The learner and instructor first compare the prepared joint with the exercise requirements, then review thickness, fit-up and the recorded stop location. They distinguish an existing preparation gap from an opening created during welding. If the record is incomplete, they note that limit instead of inventing a cause.
They agree one permitted change for a fresh labelled coupon, keeping the remaining documented conditions consistent. The next record includes what happened and what remains uncertain. No successful outcome is assumed; the exercise is about improving the investigation, not certifying the weld.
Checklist and self-check
- Identify the material, thickness and joint design.
- Record where the opening began and any restart or pause.
- Check fit-up against the applicable instructions.
- Verify the selected process, wire, gas and documented setup.
- Agree one practice change and the instructor's assessment method.
- Preserve the sample and stop if identity, controls or suitability remain uncertain.
Self-check: The opening disappeared after lowering a control. Is the joint now proven sound?
Answer: No. Avoiding a visible hole does not establish adequate fusion or suitability. Keep the comparison record and obtain the assessment appropriate to the joint's intended use.
Put the choice in context.
Try the welding process finder to narrow your equipment research, or compare a complete setup in the ownership cost calculator.
References
Open the publisher’s page. If a new tab fails, use “Open directly” or copy the address into your browser.
- Miller — MIG weld defects, 19 February 2024; checked 31 October 2026 · burn-through explanationOpens the source in a new tabmillerwelds.comLink checked · 31 Oct