In this guide
Make a compatibility sheet
Write down the exact machine, torch model, process, wire or filler and gas. Record part numbers before ordering accessories. Similar-looking connections and consumables are not proof of compatibility.
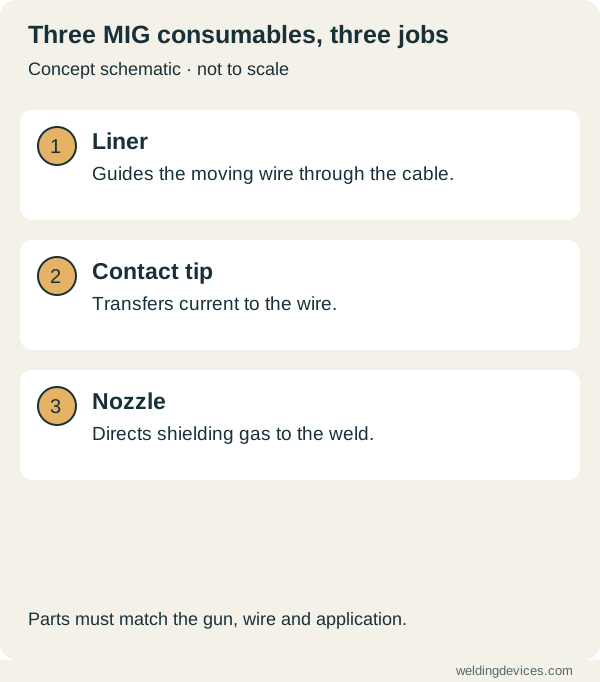
Schematic; source.
MIG torch parts
The liner guides the wire, the contact tip transfers current and the nozzle directs shielding gas. Match these parts to the manufacturer's system and the wire being used. Check the torch's own rating as well as the power source's output. Keep appropriate replacement tips and covers available so a minor maintenance issue does not end the session.
Feeding and other torches
Confirm wire size, roll type and spool compatibility. Aluminium may require a specifically supported feeding arrangement. For TIG, check torch cooling, connector type and remote-control support before assuming a generic torch will work.
Gas equipment
Use the correct regulator, fittings and hose for the cylinder and gas. Secure cylinders, inspect the equipment and follow the supplier's handling instructions and local requirements. Avoid homemade gas adaptors or forced connections. Cylinder rental, deposits and refill arrangements belong in the complete setup cost.
Keep useful records
Store the manuals and a short spare-parts list with the machine. Compare wires, rods and gases in the consumable library; choose replacements by specification rather than packaging colour.
Follow the connection from machine to joint
Draw a simple equipment list containing the power source, torch or holder, feeding parts, gas arrangement and consumable. Record exact model and part numbers. For a torch, include its documented rating, connection type and cooling requirements. A similar-looking connector or a broad compatibility claim in a marketplace listing leaves important questions unanswered.
Ask the supplier to confirm the complete arrangement for your process and application. If an adapter is proposed, request its supported use in the documentation. Do not improvise a gas fitting or electrical connection to make a part fit. The manuals library provides official documentation routes, while the equipment record keeps the answer attached to the actual machine in your workshop.
Treat feeding parts as a matched arrangement
For a wire-fed setup, identify the supported wire material and diameter alongside the relevant liner, contact tip and drive-roll arrangement. Follow the machine and consumable instructions for fitting and adjustment. A feeding problem may come from several parts of the path; replacing one familiar item without checking compatibility can leave the underlying issue unresolved.
Keep a small stock of appropriate wear parts with clear labels. Avoid mixing visually similar tips or liners in one unmarked box. When changing configuration, record what changed and keep the previous setup identifiable. That makes troubleshooting more systematic and helps prevent the next operator from inheriting a combination that no longer matches the wire loaded in the machine.
Check torch handling on a representative joint
With the equipment safely isolated, try the torch in the intended working position. Check reach, cable movement, visibility and access around clamps. A comfortable torch upright may be awkward inside a corner. Confirm that any planned cable arrangement follows the instructions and avoids unnecessary damage or strain.
For a supplier demonstration, ask to use the same or equivalent joint and supported torch configuration. Note whether an accessory makes the demonstration possible and whether it is included in the package. A torch can be a significant part of the practical equipment choice. Its usefulness depends on access and documented capability, not just on sharing the power source's brand name.
Read the gas equipment instructions
Confirm the regulator or flowmeter's intended gas, pressure range and connection arrangement. Follow the cylinder supplier's guidance for handling, storage and connection. Use the specified method for checking the system. Do not assume that a pressure indication proves the required gas flow at the torch or that a fitting can be safely adapted because its threads look close.
Keep hoses and connections in the routine inspection plan. If a component is damaged or its compatibility is uncertain, have the arrangement reviewed before use. Include replacement availability in the purchase decision. A cheap accessory becomes poor value if you cannot obtain the supported seals, fittings or service needed to maintain the system properly.
Make replacement decisions repeatable
Create a short consumables sheet with the process, part numbers, approved alternatives where documented and supplier details. Include the relevant inspection and replacement instructions. Record recurring failures and the conditions in which they appear. Repeated wear or feeding trouble deserves a wider review rather than an assumption that every replacement part is defective.
Use the consumable library for material and process context, then confirm the exact setup in the manufacturer's documents. Keep service work within authorised competence. A well-maintained connection chain supports consistent operation because each part has a clear role and suitable specification. Buying accessories individually without that context can make an otherwise capable machine unnecessarily difficult to use.
Keep the original package documentation and supplier confirmation with the parts list. When a replacement is proposed, compare its documented compatibility before fitting it. A consistent record prevents an apparently small accessory change from creating an unexplained difference in the next practice session.
Put the choice in context.
Try the welding process finder to narrow your equipment research, or compare a complete setup in the ownership cost calculator.
References
Open the publisher’s page. If a new tab fails, use “Open directly” or copy the address into your browser.
- Miller / Bernard — MIG liners, contact tips and nozzles · sourceOpens the source in a new tabmillerwelds.comLink checked · 31 Oct
- CCOHS — Storage and handling of compressed gas cylindersOpens the source in a new tabccohs.caLink checked · 31 Oct
