In this guide
Reader question: Why does shielding gas keep flowing after I stop a TIG arc, and how should I set that time?
Learning objective: By the end of this lesson, you can explain what TIG post-flow protects, separate general guidance from machine-specific controls, and run a simple observation-based check without inventing a universal setting.
Direct answer: TIG post-flow keeps shielding gas around the hot tungsten electrode and the end of the weld after the arc stops. Keep the torch in position until that flow ends. Set the time from the procedure or the exact machine manual, then check the result; one number does not suit every current, electrode, material or power source.
What post-flow is doing
In gas tungsten arc welding (GTAW, commonly called TIG), the arc stops before the electrode and weld end have fully cooled. Post-flow is the timed gas flow after arc extinction. It is different from pre-flow, which starts before the arc.
Miller’s 11 March 2026 shielding-gas guidance says post-flow protects the solidifying weld from the atmosphere and shields the cooling tungsten; it tells the operator to hold the torch over the weld end until flow stops. That is manufacturer guidance, not a code requirement or a universal machine setting. Read Miller’s guidance.
The torch position matters because the gas must still cover the hot zone. Pulling the cup away as soon as the arc disappears wastes the remaining flow. For the broader role of shielding gas during TIG, see Shielding gas: match the process and material. If the tungsten has already touched the pool or filler, post-flow cannot undo that contact; use the inspection and preparation steps in TIG tungsten contamination: when to stop and reprepare.
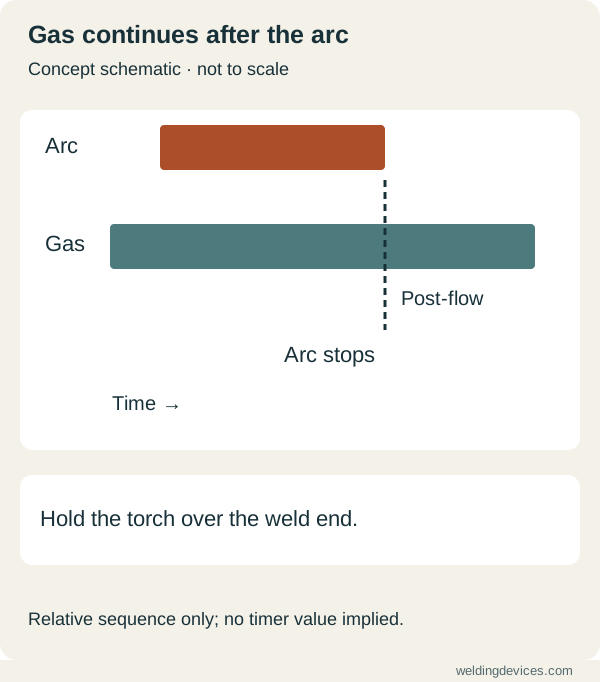
Schematic; source.
Why there is no universal post-flow number
Post-flow controls differ by machine. The Lincoln Electric Precision TIG 375 manual describes an adjustable range of about 2–60 seconds on that model. By contrast, the Miller Multimatic 220 manual describes an Auto-to-25-second control. These ranges show why a setting copied from another welder may not even map to your panel. See the Precision TIG 375 manual, page B-5 and the Multimatic 220 manual, section 6-20.
Miller also publishes a manufacturer rule of thumb—welding amps divided by ten, with a stated minimum of eight seconds—in its 2026 article. Treat that as Miller’s general recommendation. A qualified welding procedure specification (WPS), the current manual for your exact power source, or material-specific instructions take priority.
Material changes the risk. TWI’s titanium guidance says the equipment must continue shielding after arc extinction so the weld cools within the gas shield; it also discusses trailing and backing protection for titanium. That is a titanium-specific warning, not evidence that every carbon-steel practice needs the same arrangement. Read TWI Job Knowledge 110.
A controlled way to check your setup
Start with the approved procedure or exact model manual. Confirm that the gas, cup, torch parts and flow arrangement match the job. Then make a labelled practice weld on appropriate scrap under supervision. End the arc normally and keep the torch steady over the finish until gas flow stops.
After cooling, record the machine, current, tungsten size, material, post-flow setting and what you observed at the tungsten and weld end. A discoloured tungsten or weld end can have several causes, including shielding disruption, leaks, unsuitable torch setup or moving away too early. Do not assume the timer is the only variable, and do not increase gas flow blindly: excessive velocity can disturb smooth coverage.
Hypothetical worked example
Suppose a learner uses a TIG power source whose manual offers automatic post-flow and a manual time setting. The shop WPS specifies the gas and procedure but leaves the machine on its approved automatic mode.
The learner makes two labelled beads with the same prepared coupon, current range, torch parts and technique. On bead A, the torch is lifted immediately after the arc stops. On bead B, the torch remains over the weld end until post-flow finishes. The learner records the observations but does not claim that colour alone proves weld quality.
If bead A shows a darker weld end or tungsten while bead B does not, the result supports checking torch hold position first. It does not establish a new production setting. If both look abnormal, the learner stops and checks the approved setup, gas path and exact manual rather than compensating with an invented time.
Practical post-flow checklist
- Identify the exact power-source model and current manual.
- Follow the WPS or supervised practice plan where one applies.
- Confirm the selected gas and assembled torch are suitable.
- Check hoses and connections for damage or leakage.
- Use the documented automatic mode or specified time.
- Finish the arc normally and keep the cup over the weld end.
- Wait until post-flow stops before moving the torch away.
- Let the tungsten cool before touching or changing it.
- Record settings and observations on labelled practice pieces.
- Stop and investigate repeated discoloration or poor restarts.
Self-check
Question: Your colleague uses 12 seconds of post-flow on a different TIG machine. Should you copy it?
Answer: No. Use the WPS or the manual for your exact model, then verify the outcome under controlled practice. Machine ranges and automatic functions differ, and material-specific shielding needs can be more demanding.
Put the choice in context.
Try the welding process finder to narrow your equipment research, or compare a complete setup in the ownership cost calculator.
References
Open the publisher’s page. If a new tab fails, use “Open directly” or copy the address into your browser.
- Lincoln Electric — Precision TIG 375 Operator's Manual IM703, page B-5 · See the Precision TIG 375 manual, page B-5Opens the source in a new tabch-delivery.lincolnelectric.comLink checked · 31 Oct
- TWI — Welding of titanium and its alloys, Part 2 (Job Knowledge 110) · Read TWI Job Knowledge 110Opens the source in a new tabtwi-global.comLink checked · 31 Oct
