In this guide
Identify the alloy first
Aluminium is a family of alloys. Many common wrought grades can be fusion welded, while some high-strength grades are susceptible to cracking. A process recommendation is incomplete until the grade and intended service are known.
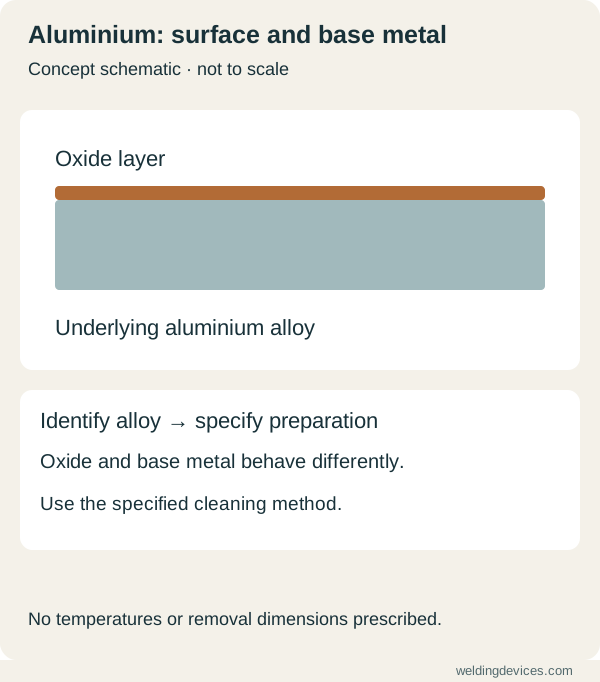
Schematic; source.
The surface is part of the problem
Aluminium oxide melts at a much higher temperature than the underlying metal. Preparation must address grease, moisture and oxide. Use a suitable cleaning method and tools reserved for aluminium; follow the consumable and procedure instructions.
TIG or MIG?
AC TIG is commonly considered for controlled work and visible joints. Confirm that the machine has AC output: a DC-only TIG function on a multiprocess machine does not give it the same aluminium capability.
MIG can suit repeated aluminium fabrication. Soft wire needs a compatible feeding arrangement. Depending on the machine and reach, this may involve a spool gun or push-pull system. Check compatibility rather than assuming that any steel MIG setup will feed aluminium reliably.
Workshop example
Before practising an aluminium box corner, make a small job card: alloy, thickness, joint shape, filler, shielding gas and preparation method. If the alloy is unknown, resolve that uncertainty before experimenting with settings.
A useful comparison question
Ask a supplier to demonstrate your material and joint on matching coupons. Compare feeding consistency, start and stop quality, distortion and preparation time. Judge the whole workflow rather than the shine of one demonstration bead.
Build a preparation routine you can repeat
Put identification, cleaning and handling in a clear order. Keep the alloy information with the workpiece rather than relying on its colour or weight. Confirm the filler choice against the intended application. Arrange dedicated preparation tools and a clean place to hold prepared parts. An offcut from an unknown source may be useful for practising hand movement, but it cannot establish a procedure for identified production material.
Think about the whole preparation area. Dirty gloves, a shared brush or a contaminated work surface can undermine carefully cleaned edges. Follow the specified cleaning method and the product safety instructions. Make a note of when the parts were prepared and avoid unnecessary handling afterwards. The point is to make clean preparation normal, rather than something done only when a bead goes wrong.
Check access before choosing MIG or TIG
A small box corner offers a useful thought exercise. With TIG, can you keep the torch and filler in a workable position without leaning the cup into the joint? With MIG, will the gun reach the corner while maintaining the required position and shielding? A machine can support aluminium welding and still need a particular feeding arrangement or torch to handle your actual job.
Ask the supplier to demonstrate the intended alloy, thickness and joint. Look at starts, stops, access and feeding consistency, not just the middle of a long straight bead. Include the time needed to fit the parts and change consumables. If the demonstration uses an accessory, record its exact name and whether it is included. This turns a broad capability claim into a useful purchasing question.
Practise on an identified coupon
For supervised practice, use a simple coupon with a known material and consistent preparation. Begin with one process and the manufacturer or trainer's documented setup. Keep a record of the joint, consumable, machine programme and observations. Repeat the same exercise before changing the joint geometry. It is difficult to diagnose a new result if the alloy, gap and technique all changed together.
The first objective is repeatability. Can you make the same movement, see the pool and finish in the same place? Photograph the cooled coupon with its label visible. Record when a tungsten contamination event, feeding interruption or shielding concern occurred. Such observations help a trainer identify the next exercise. They are more useful than simply describing a weld as shiny or ugly.
Give starts and stops their own attention
Short joints often reveal more about your setup than a long demonstration run. The beginning and end deserve inspection alongside the central bead. Put a restart exercise on separate practice material, with the preparation and sequence chosen by your instructor. Avoid hiding an uncertain result beneath more filler and assuming that additional metal fixed the issue.
If a fault appears repeatedly in one location, look at access and sequence as well as settings. Does the torch angle change near a clamp? Is your filler hand running out of room? Did the workpiece get warmer across repeated practice runs? These are questions to investigate, not proof of a single cause. Keep the observations connected to the sample so that advice can be specific.
Decide what successful work means
An ornamental item, a transport component and a pressure-containing part can demand very different evidence. Agree the relevant dimensions, finish and inspection before welding. When the application requires qualified personnel or a controlled procedure, attractive practice samples cannot replace those requirements. Be especially careful about copying a social-media method onto a different alloy or service condition.
Use the TIG learning guide for coordination exercises, or the MIG guide for gun control. Keep alloy-specific requirements with the job rather than treating those general lessons as an aluminium procedure. A sensible next step is a supervised trial on your actual material, followed by a clear account of preparation, equipment and inspection requirements.
Put the choice in context.
Try the welding process finder to narrow your equipment research, or compare a complete setup in the ownership cost calculator.
References
Open the publisher’s page. If a new tab fails, use “Open directly” or copy the address into your browser.
- TWI — How to weld aluminium · sourceOpens the source in a new tabtwi-global.comLink checked · 31 Oct
- ESAB — Guide to aluminium weldingOpens the source in a new tabesab.comLink checked · 31 Oct
- ESAB — Beginner’s guide to TIG weldingOpens the source in a new tabesab.comLink checked · 31 Oct
